Archives for: May 2006
05/29/06
Recovery from Wedding Photography Disaster
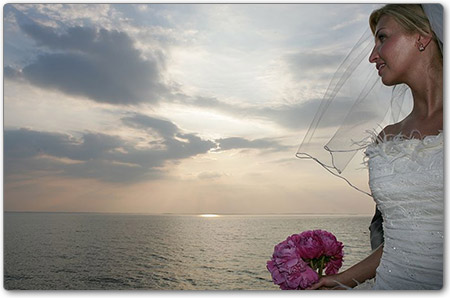
Have you ever been in situation, when the "F-word" comes to mind and slips off your tongue? Well, I just had it - this weekend. After the wedding I successfully downloaded the photographs from the first CF and inserted the second one into the card reader. Ooops - nothing, all the images are lost. How come? I just looked at those images!
OK. This wasn't the best moment of my life. The CF card had about 800(!) images that could be lost forever. Why do I say "could be"? Because I had the faith and knowledge to be sure that the images were still on the CF, but somehow the FAT (File Allocation Table) on the card was corrupted.
So, when I came home, I started looking for solution - searched on "FAT recovery repair". One of the links that come up was - DiskInternal.
As it turned out, they have several solutions to recover lost files. And there is a good while simple in use tool - DiskInternals Flash Recovery. It works specifically with flash cards (removable drives) and recovers lost images. You don't have to know anything about the technicalities - simply press the button and your images are back! That's what saved me. Otherwise the image you see here would be lost as many others.
I suggest that before buying the software you try the trial version to see that it will recover your images. The trial images allow you to save only small files. The full version costs $39.
05/25/06
A Signle Sunlight Photography Approach
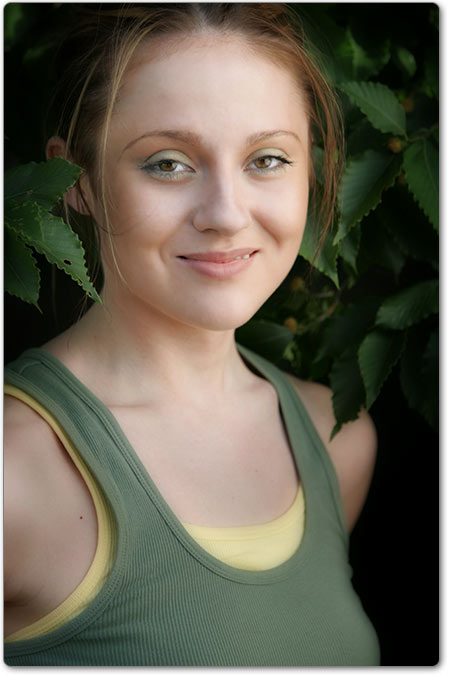
Yesterday I was shooting a portfolio for a want-to-be-a-model girl (name - Polina). We didn't go any far, just climbed on the roof and used the sunlight as the main and the only source of light. And here I want to share how I created this light to illuminate the girl.
05/23/06
Baby Photography Session - Meet Parker

This weekend I was asked to make a photograph of a baby and his mom for an advertisment in a magazine. The advertisement will be about artificial fertilization. So the idea was to capture the connection between the mom and the baby, and express the excitement(?) of being a mom, but still concentrate on the baby. My friend asked Hilley (the mom) - I hope, I have not misspelled the name - to participate in the shoot with her little Parker.
And here is how I've done the photographs...
Tips & Techniques from Photoshop Users Groups

While wandering in the vast seas of the Internet I found another island of information - "Photoshop Users Groups". As I understood it's a group of people interested in Photoshop, who at the meetings are discussing and exchanging information on various topics related to Photoshop. One of their pages (Tips & Techniques) holds a collection of good links to such resources as: BW Conversion, Camera RAW, DNG, HDR, Infrared, Keyboard Shortcuts, Lens Correction, and etc.
I recommend that you look at the other page called "Past Meetings", there you will find links to PDF documents about digital workflow, discussions about photo labs, and more interesting info.
05/22/06
Adobe Blogs - Personal Look of Adobe Corporation

Most of the time large corporations loose their person's face and become a huge lump of something impersonal. But there are thousands of people, who are affecting our lives in one way or another. Adobe Corporation is one of such giants that affect live of photographers around the world. How many people there do you know? Adobe Blogs is such a way to learn about those people and learn from them.
For instance, Jeff Tranberry has written several good posts on scripting in Photoshop. Scott Byer writes interesting stories about the underbelly of Photoshop and struggles it brings. Or read posts of one of the most prolific bloggers - John Nack.
How to Market Your Local Business on the Internet

Yaro Starak maintains his blog "Small Business Branding", which name already tells a lot. And if you look deeper into the posts you will find one called "How to Market Your Local Business on the Internet". In this post Yaro pin points several important factors that affect your marketing on the Internet, such as clearly stating your local area, listing the benefits, defining your difference and so on.
I suggest that you look through the other posts in this blog to find more information on marketing on the Internet.
05/18/06
The Viral Garden's Top 25 Marketing blogs

Mack Collier has compiled a list of top 25 marketing blogs based on their ranks in Google and Alexa search engines. This is a great list to learn more about marketing approaches and techniques to boost your business.
And you don't have to walk far to find another good blog about marketing - simply start reading Mack's blog.
Photoshop Tip - Perspective Control while Resizing

We often resize objects to fit into a certain size. And such operation has a short cut - Ctrl-T (free transformation). But sometimes we need an additional tweak of the perspective. There is a separate menu item to do so: Edit, Transform, Perspective. This tool is useful, though most of the time something simpler would suffice. And that's a neat trick in Ctrl-T mode - while holding Ctrl key drag any of the corners to freely adjust the shape.
Note: You may drag the sides as well, and to lock the movement only to one of the directions hold Ctrl and Shift.
Extra: To ensure that your lines are straight in the picture (while adjusting perspective) press Ctrl-' to reveal the grid (press once more to hide it).
GIMPshop insetad of Photoshop
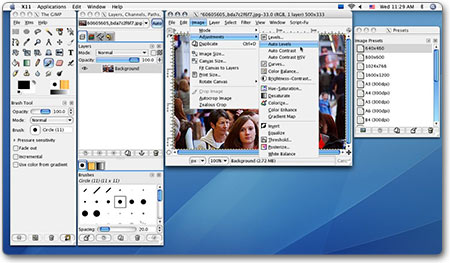
You probably heard about GIMP, the free photoshop-like software. This is an open source project, which resulted in a robust software with many features, you may even compare it with Photoshop, though Photoshop was on the market for years and they have a lot of money and time to tune up and upgrade the application.
What is GIMPShop? Well, GIMPshop is a adjustred version of the GIMP. The idea was to make the UI more like Photoshop. And now GIMPshopw is available for Mac OS as well as Windows. You may want to findout the difference between Photoshop and GIMPshop, so read the post at blog on GIMPShop.
Latest news from Adobe (Photoshop)

To hold your finger on the pulse of latest news from Adbobe about Photoshop, there is a special website for such people - PhotoshopNews.com. As one of such news is the latest update of Photoshop software or update to Bridge application.
For example, there is even a post:
From the Adobe Photoshop Windows User to User Forums comes a report that the 9.0.1 update for Windows effect mouse clicks on menus in some cases. Menues require an extra click to regain focus from non-maximized document.
05/17/06
Living Photoshop - Story of A Quarrelsome Font

Have you ever been interested in what-is-going-on behind the scenes in Adobe? Take for example Photoshop product. What are the real people do there? Well, I just found a great article about a Good Day of one of the Adobe employees - Scott Byer.
This story is about chasing a bug in Photoshop. As it appeared at the end, the bug was a Quarrelsome Font (that's how I would call this one). So, if you have a spare minute, you may find this reading quite amusing and interesting.
Scott Byer's Blog: My goal is to provide an inside-out perspective on Photoshop, things I find interesting from those who use Photoshop day in and out, tricks about getting Photoshop to behave the way you want it to from an engineering perspective, explanations about why it sometimes might not. I want to convey the excitement that comes from working on such a large, complex, and interesting product that remains great motivation for working hard even after many years. And maybe reflect back the loyalty and interest that the product has gotten as a fan favorite. Because, as an engineer, if you're not doing it for the customer, you've lost sight of what's important.
How To Process A RAW File
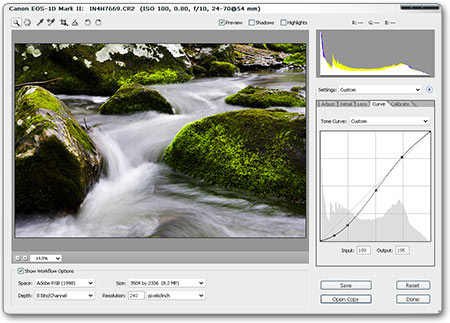
Sometimes we don't use the existing tools to their full potential. And Adobe CameraRAW is such an example. For example, how many of you and how often used the Curves in that tool? Probably not many. I am too, have not used it much. Most of the time I rely on the later adjustments in Photoshop. However CameraRAW has many more adjustments to offer.
You may want to read the "How To Process A RAW File" article written by Rob Sheppard for PC Photo magazie. Rob is revealing the list of features in this Adobe addon and the meaning of those adjustments.
Photoshop Tip: Increase/Decrease Font Size

If you are lazy as I am, then you want to make as fewer moves as possible. Have you tried to change the font size in Photoshop? What do you do? Select text, move mouse, click on dropdown list, select or type size - right? Wrong ![]() There is much simplier solution: Select and press Ctrl-Shift-">" to increase size or Ctrl-Shift-"<" to decrease size of the font.
There is much simplier solution: Select and press Ctrl-Shift-">" to increase size or Ctrl-Shift-"<" to decrease size of the font.
Extra: The interestring thing is, this shortcut works in MS Word!
Composition: Positive and Negative space

In painting art classes they teach more then usualy you could learn in photography school. And here is the article about "Composition - A Primer on Positive and Negative space" by Michael Fulks at Apogee Photo Magazine. In this article you will learn why you have to care about the space in the frame around your subject, and why the tree growing "out of" your uncle's head is not simple funny but destroys the balance within the image.
Photonhead.com - Photo tricks and fundmanetals

Taking better photos has more to do with attitude than technique, knowing a few tricks can only help... Photonhead offers a blend of photographic concepts and tips for the digital era. Shopping for digital cameras? Visit the buying guide for a look at new and popular models. Don't miss the SimCam, a great way to learn about exposure. Enjoy your visit and remember: take more pictures!
05/15/06
Gorillapod - Tripod that climbs?
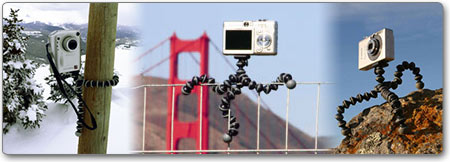
For those of us, who owns a small digital camera and wants to have something to rely on while taking the photos, there is a solution. Gorillapod created by Intro 2020 is a tripod that climbs, well... almost.
Here what they say about it:
It’s lightweight, compact, portable, bendable, wrappable and it’s a tripod!
The Gorillapod firmly secures your compact digital camera to just about anything – anywhere and everywhere! It wraps around posts, trees, and railings, even sides of rocks, to form a stable anchor for compact cameras.
 The Gorillapod has legs that can be contorted into various positions, made possible by ball and socket type joints that bend and rotate 360 degrees. The Gorillapod also doubles as a standard mini tripod with rubber grips on the feet.
It is supplied with a quick release plate that can be clicked into position and the release button can be locked for added security.
Source: PhotographyBlog.com
ACDSee Digital Photography Tips

Acdsee, which provides the powerful tools to manage your photographs, has several articles about digital photography - "Digital Photography Tips". These articles cover topics from "Exposure Tolerance of Typical Small Format (35mm style) Digital Capture Files" to "Underwater Photography: Starter Tips and Ideas" and "Creative Experimentation".
05/12/06
Learn and Promote via eZine Articles

Somewhere in the vast cosmos of Internet a website eZineArticles has found its place. And I have to say that they have grown quite large and host a lot of articles on various topics. One of the topics is Photography.
And it's not only a good resource to learn stuff, but you can promote your website through them. How? First of all, there are some rules - anybody can host your article if they provide link back to your website. So, just submit an article (the more the better), and first they and then other people will host your articles and point to your website. It means that you will get links to your website from many other places.
05/11/06
DigicamHelp - Place to start your photography journey

In pursue of search for more advanced photography techniques sometimes I forget about the beginners in this art or those who are looking for a place to start. And here is a nice place go - DigicamHelp.com
Easy-to-understand information about digital cameras, accessories, image editing and more. Digicamhelp is simply one of the easiest places on the web to learn about digital photography!
Photography Articles by Chuck Doswell

Sometimes we realizie that we don't know some basic things about photography. I, for instance, still won't be able to tell you the aperture numbers ![]() . And I realize that there are many folks that would want to read a good article about "Some Basic Elements of Photography", which was written by Chuck Doswell. Or if you know those basics and want to move on, here is another article by Chuck - "Some More Advanced Photography Skills".
. And I realize that there are many folks that would want to read a good article about "Some Basic Elements of Photography", which was written by Chuck Doswell. Or if you know those basics and want to move on, here is another article by Chuck - "Some More Advanced Photography Skills".
Make Something Happen With Your Blog

Silly me! I've been visiting this blog for some time now and still have not told you about it. This blog called "Copyblogger" is a great place to get tons of information on how to write, attract visitors to your website and all other kind of marketing related to blogging.
Don't forget to bookmark this website. It definitely worth it!
Thanks to some of the posts and articles in that blog I am doing well with my own blogging.
Photoshop Tip: Resize and Keep Proportions

Have you tried to resize the object and found that it's very easy to mess up the proportions? Me too. But there is an easy fix to that - hold Shift and adjust the size. You have to remember only one small detail - release the mouse button before the Shift key.
Note: This works in Crop and Selection as well.
How to Deliver Exceptional Customer Service

Do you own a small business? Because if you do, you may be interested in a few tips about customer service. I mean about the right way to establish and maintain the customer service. Simply read the short article "How to Deliver Exceptional Customer Service" at Wemaster's Library.
Don't forget to check out some other articles on various topics there.
05/10/06
Photoshop Tip: Lines with Brush

Once in a while we need to draw a line or have an edge that we draw with a brush. For example, we need a smooth border in a layer mask. Not that ago (before learning this technique) I used my hand movement to do such thing, and most of the time I missed ![]()
Though there is an easy way. Simply click with brush where the start of the line shoud be and while holding Shift click on the other end of the line. Yes, it is that simple, but how convenient!
Virtual Reality and Panoramas

Have you ever wondered how it feels to be in a photograph? I mean beside the photographer when he or she takes the photograph. To be able look around and feel it. With the latest advance of technology, we it becomes almost possible. There is "Virtual Reality thing".
Rob Galbraith has posted a link to a website with such 360 degree panoramas enabled by VR to look around.
I followed one of the links and found a blog called Refocus, which has underwater panoramas. Take a look - it's a breathtaking view.
Photo Gallery: Tailor

For the portfolio, which I was doing for ELSE Galley (a store in Georgetown), I need a few images of the tailor and the services the store offers to its customers. One day I visited the store and while the tailor was working I took a few images. Not all of them are here, but some nice ones and edited for a somewhat "fine art" finish are presented here.
Effects with Camera Raw
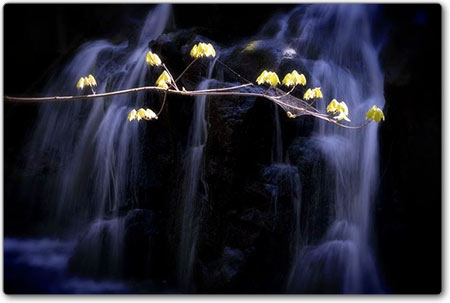
During my latest hike in Shenandoah mountains I took this photograph (above). By looking at the image you may think that I had to do a lot of manipulations in post-processing. Strangely, not at all. The main effect (bluish background with the fall) is achieved in Camera Raw. I simply played with the image in the Camera Raw tool before actually opening it in Photoshop. You want to find out how?
05/09/06
Categories: Business of photography, Studio Photography, Wedding Photography, General Photography
Photography Information Centre at Photographers.Co.UK

This another website to bookmark. On this website you will find several good articles on various aspects of photography, such as:
Photoshop Tip - Level The Horizon

Is your image crooked? Not a problem, there is a quick fix for that. Switch to Measure tool - under the droplet (Shift-I) and draw the line along your lines in the picture, which should be vertical or horizontal. It could be the horizon line or a wall of a building - simply mark the line that should be straight. And the go to the main menu - Image, Rotate Canvas, Arbitratry. The angle will be already there. Press OK and here it is - your image is straight, you just have to crop off the unwanted areas.
Photoshop Tip - Crop Tool Snapping

Have you ever tried to precisely crop an image when there are just a few pixels that you want to get rid of? The crop tool just snaps to the document border or to the layer border. Sometimes I just zoom in to make the difference much larger and then adjust the crop area.
But there is a better way - Hold Ctrl key (or Command on Mac) and adjust the crop area to precisely crop your image - down to a pixel.
As well when you use your crop tool you can easily move the crop area with the arrow keys and zoom in/out with Ctrl/Command "+/-" keys.
Another Way to Sell Your Prints

Do you have some great photographs that people probably would want to buy? Do you want to sell them? Well, there are multiple choices to do it, and you probably know some of those. Here is one more way - Worldon Papers. It's a relatively new venture and they need a litle boost. As well as you may be interested in it. Usually when people start doing business they are up to some discounts and negotiation. May be it will work for you. Here is another reason:
Unlike other services charging fees for reselling images, we believe that photographers should not have to pay anything, and we will bear all the associated hosting/storage expenses. The service is completely FREE.
Anyway there are already some photographs that are nice to look at.
05/08/06
Photo Gallery: Shenandoah 06.05.06
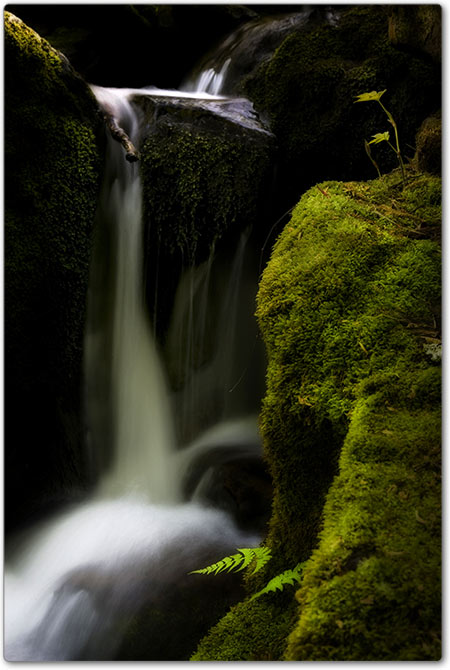
Another beautiful spring day in the mountains. Only this time it took a lot of strength from me. I hiked about 6 miles (round trip) along the Overall Falls Trail (or something like that - by the Hogback overlook). There is the biggest waterfall in the whole park - 93 feet (about 30 meters). But the waterfall is not the only thing to see there. Just after the waterfall you come to the gorgeous view on the west side of the mountains. And here are the images from that trip.
05/05/06
Beyond Shotz: A Monthly Photo Journal From Photo Enthusiasts

This issue is a special one. It brings forth a bouquet of articles telling the story of our society. Leading us to places where we rarely go, talking about the people who we rarely hear about, showing us pictures of those who are at the very edge of our society and telling their stories.
Story of a Photograph - Cast Away
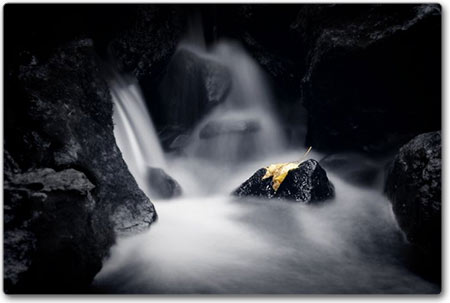
This is the first story that starts a series of many similar stories about photographs. In this story I want to tell about one of my favorite photographs – “Cast Away”. As any picture we take this one has its own story. And this story will continue a bit after the photograph was taken. The post-processing manipulations will be covered at the end of this story.
CSS vs. Tables on Handhelds

XHTML is a good however a tough thing. It allows use tags <table>, which was often used to support the layouts of websites, not only to present tabular data. There are many heated discussions on the Net about CSS versus Tables. For example, there is a whole section dedicated to this controversy.
Though my point is somewhat different. I want to stress out the growing need for websites that could be viewed on handhelds (i.e. PDAs, Palms, smart phones, Pocket PCs, etc.). Even Google introduces a new search - only for mobile viewable websites. So, there is a whole new(?) market.
SEO and Marketing News and Opinions

Nowdays a representation of your business on the Internet is a must. And it's not only the representation (i.e. simple existence), you have to promte your business via marketing efforts and have a good search engine ranking. And there are too many questions regarding all of it. Fortunatelly, the Internet is full of information, and here is another source for you too look through - Blog@v7n.com. The blog discusses the marketing news and provides opinions on SEO and marketing topics. Don't forget to browse through the BlogRoll there.
05/04/06
The Art of Photography Show

There is "an international exhibition of photgraphic art, featuring the best of the best from around the globe." This exhibition is held in San Diego at Lyceum Theatre. The doors are open April 4 - June 4, 2006.
Well, I am not going. For me and for those who are not going, we can see some of the photographs from the exhibition.
Pinhole Photography Resources
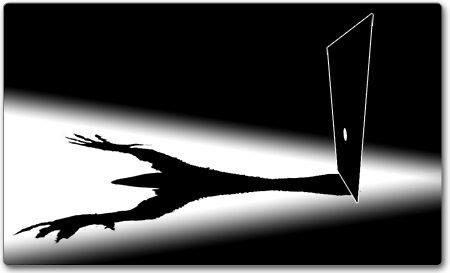
Many times before I heard about pinhole photography. Some of the photographs taken with a pinhole camera appeared in photography forums and galleries. Though I've never looked deeper into this subject. It seems photographs taken with such a camera (a box and a hole) has their own appeal and magic. Previous posts here referred to some of such photographs. For those of us who is interested to learn more about pinhole photography there is a good set of links reagarding this subject at Pinhole Visions.
Some other photographs has that spooky feeling. Watching somebody's life through a hole? Maybe. Well, that feeling moved me to create this freaky image for this post.
Martha Casanave Photography
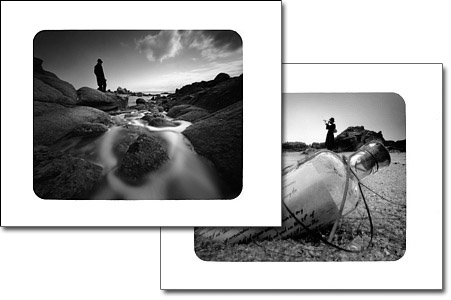
I continued my walk through the gallery of pinhole photographs. And here is another name - Martha Casanave. Her gallery "Coastal Pinholes" is like magic. You have to see it to understand why.
Herbert Boettcher Photography

Before this minute I was not that much impressed with architectural photography. Oh, yes, there are many interesting buildings and scenes. Many photographs are quite interesting, but the photographs of Herbert Boettcher take it to another level. The only thing is that his website is extrimely slow (at least from where I am accessing it).
The interesting thing is that I came across his photographs in a gallery of pinhole photographs. If you scroll down, you will see those bright and captivating photographs.
A Portfolio for a Store
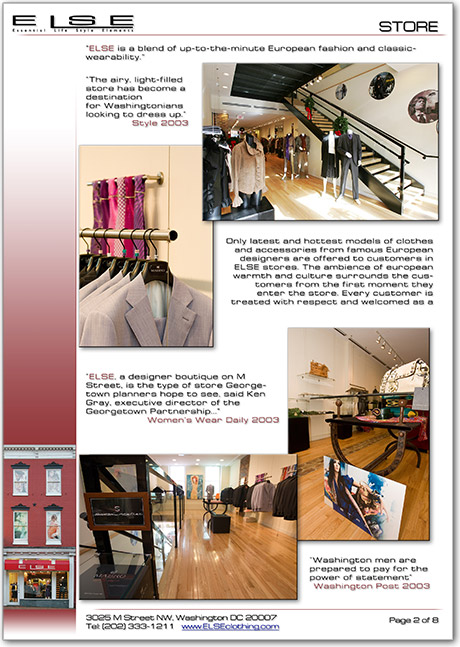
There was a gap in my postings. I am sorry for that. The reason was that I had to quickly create a portfolio for a store. The assignment included photographs of the store and a design of several pages (PDF format).
So far I just made a draft of the portfolio, but the client (Pierre Lupesco, the owner of ELSE Gallery) is already happy to see the current progress. The image above shows the second page of the portfolio.
The previous portfolio of the store was too busy; and it was hard to digest what it presented. So in my version I tried to retain simplicity with the business style. The left margin hopefuly creates the base for the page and has the facade of the store. More like a constant reminder of what it is about. The rest of the page is quite standard, except the shadows to the text and the images. I like that floating effect. The shadows somewhat separate the content from the page layout and create a lighter feel (in my opinion).
When I was taking the photographs, my goal was to interestingly present the prodcuts (clothing and accesories) and give the overal sense of the store. Two major conditions I kept in mind: (1) keep the walls straight up and (2) find better angles to draw the eye into the photograph and make it not that boring.
05/02/06
Do we really need that high frames per second rate?

Many people (and sometimes me) seem to measure the worthiness of a camera buy its features (or quantity of those). One of the features is the number of frames per second (FPS) the camera take. The higher the number, the better. But I want to ask us a question: Do we really need that high frames per second rate?
Do you have the answer to this question? If not than may be I can provide something that would give you an idea whether you need that thing or not. This is just my view on this subject, and applies to the ways I use the camera and the kind of photography I do. Though some applications could have parallels with your work.
05/01/06
The Projections of an Object in Photography (and more)

Want to learn more about composition? Ok, then here is a PDF "Artistic Composition for Computer Graphics" where Bruce Gooch and Mario Costa Sousa explain some of the rules of composition. For example:
Artists have their own heuristics for choosing a viewing direction that are reasonably consistent with the psychology results: pick an off-axis view from a natural eye height. Direct 45 degree angles are avoided. Another rule is to have the projections of front/side/top of the object to have relative areas of 4/2/1 on the canvas (often expressed as 55%/30%/15%). The front and side dimensions can be exchanged depending on the object.
This document is full of concise explanations of such rules. You may learn a few (if not many) things about composition.
Top 10 Tips for Painting Composition
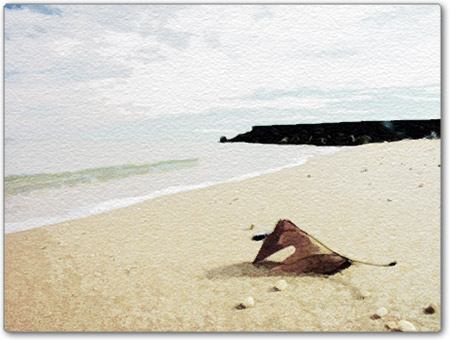
You have probably read quite a few books on photography in order to learn or polish your skills on composition techniques. And there is always something else to learn. I know that feeling. Though there are things that could be picked up from a sister (or maybe even mother) of Photography - Painting. Many techniques and laws originate from the art of painting. That's why you don't have to forget the resources related to painting.
In article named "Top 10 Tips for Painting Composition" you will find several great tips (which I had no idea of) that could improve your photography skills even further.
Note: The image in this post is a photograph, which I took some time ago and for this post tried to "convert" into a painting.
Photography Things
When we find something interesting and useful, which we want to return to and share with others, it will be posted here. It could be about composition, digital effects, photoshop, photography business or links to interesting websites.
Subscribe to RSS feed
| Sun | Mon | Tue | Wed | Thu | Fri | Sat |
|---|---|---|---|---|---|---|
| << < | Current | > >> | ||||
| 1 | 2 | 3 | 4 | 5 | 6 | |
| 7 | 8 | 9 | 10 | 11 | 12 | 13 |
| 14 | 15 | 16 | 17 | 18 | 19 | 20 |
| 21 | 22 | 23 | 24 | 25 | 26 | 27 |
| 28 | 29 | 30 | 31 | |||
Archives
- August 2008 (1)
- July 2008 (12)
- November 2007 (8)
- October 2007 (3)
- September 2007 (7)
- August 2007 (16)
- July 2007 (13)
- June 2007 (27)
- May 2007 (27)
- April 2007 (14)
- March 2007 (16)
- February 2007 (6)
- More...
Misc
 XML Feeds
What is RSS?
Who's Online?
- Guest Users: 47

Categories
- All
- Announcements (9)
- Business of photography (45)
- Equipment (72)
- General Photography (135)
- Lightroom Tips & Tutorials (10)
- News (11)
- Photographs (67)
- Photoshop and Effects (83)
- Tips (17)
- Story of a Photograph (3)
- Studio Photography (25)
- Web & Presentation (35)
- Wedding Photography (44)
- Wedding Planning (3)
LATEST POSTS
- 3D Is Not Enough - Meet 6D
- Understanding Light Stops
- Serious about becoming a Pro Wedding Photographer?
- Top 10: Ridiculous Wedding Customs
- Old Image Technique
- Pro Photo Life Blog
- Filters 101
- 10 Ways to Take Stunning Portraits
- When Pictures Hurt Websites
- Tips for Better Digital Photo Composition 101


